This year I wanted at Art Camp to create a memorable art masterpiece as a group that would be a reminder throughout the year of the fun we had, the friends we made and the lessons we learned. Through much planning and experimenting, I came up with the idea to create a tie-dye banner to hang in the schools in La Limonada in Guatemala City. Throughout the process, I knew what I wanted the finished product to look like, but having never done anything like this, I was unsure of exactly how it would turn out. The final result was more than I could have EVER imagined and I am so happy the kids can look at their beautiful group art work everyday in the schools!

First step to making the banners was getting the material ready. I bought 5 yards of plain white muslin. Muslin is REALLY awesome because you can tear on the bias. Tearing the fabric makes creating 100+ strips of fabric so much easier. After I had tons of strips of muslin. I cut each strip in thirds, giving me ~135 pieces of 3 inch x 30 inch strips. I wasn’t exactly sure how we were going to mount the banner, but I knew the easiest way would be to hang the material on something. Therefore, I sewed 1 inch pockets on top and on the bottom of each strip. After several hours of sewing, I was off to JoAnn’s to buy fabric dye. I purchased several different brands to get the colors I wanted (JoAnn’s was a little low on their stock of fabric dye). And that was all the work I did before going to Guatemala. Because of limited room in my luggage and our budget, I didn’t purchase containers to mix the dye or to use to apply to dye for the fabric. I also waited until arriving in Guatemala to purchase rubber bands and salt. We waited until we were at Art Camp to start collecting plastic water bottles for the dye.
A couple of hours before we were going to tie-dye, we starting mixing the dye. We gathered about 50 plastic bottles (some water, some Coke, some juices, etc) and started filling each bottle with hot water from the bathroom sink! We added 1/2 of the package of the dye and one bottle cap full of salt (to fix the dye to the material) to the bottle fill with water….and then shake, shake, shake and shake. The dye we used called for boiling 140° water, but we just used really hot bathroom sink water and hoped that with shaking really hard we would get the same result. After we had mixed all the dye, we separated each bottle into 2 bottles, half the mixture in one and half in the other, and then filled the bottle up again with hot water and shook some more. We repeated this separation and refill step again with some of the really dark colors or colors we wanted more of. Most of the dyes we were using say you can dilute the dye mix with 3-4 gallons of water, but we wanted really vibrant colors so we didn’t use that much water. We then poked a tiny whole in the top with a push pin.

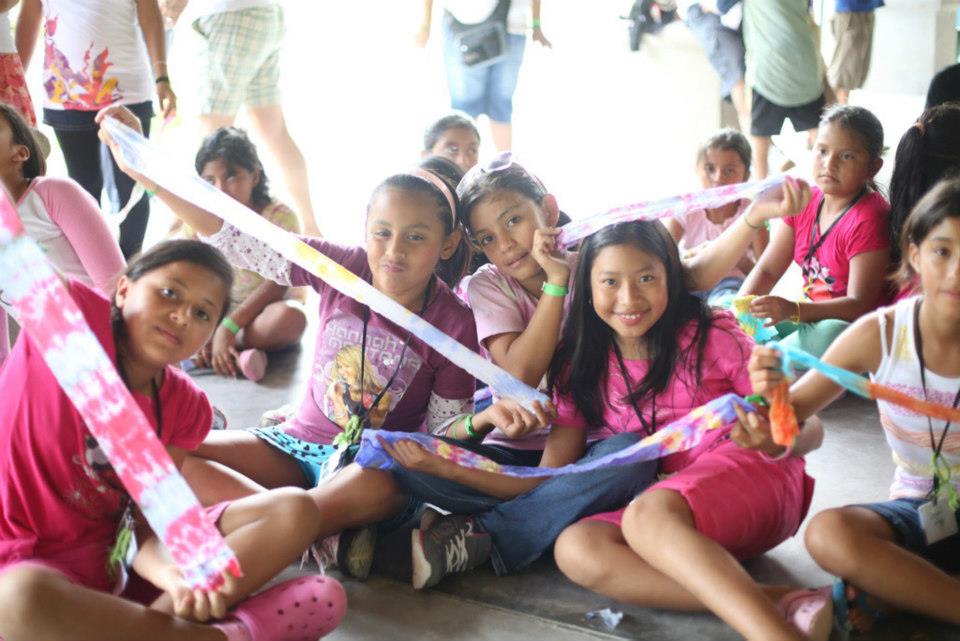
We gave each kid (and most of the adults) a white strip of materials and some rubber bands. And this is where all the fun starts. Tie-dye is created by using the material and dye to create patterns, and there are endless numbers of different ways to do it. We explained to the kids that every one could come up with their own technique for folding the material. You can roll, fold, wrinkle, twirl, swirl or squish the fabric as you wish and then bind with rubber bands to hold that pattern while you apply the dye. We then went into the grass (for easy clean-up and limited mess on the floor from the dye). Everyone chose 2 colors and sprayed their fabric as they wished. We had everyone only choose 2 colors so that we could create a “rainbow” or gradient look with the strips of fabric at the end. It is much easier to organizes strips in color order with 2 colors than with 3, 4, 5 or lots of colors.


Then we waited. We let the fabric sit rolled, folded or swirled on a table overnight. And then let each kid open a strip the next day. We didn’t bother with names or who’s was who’s. We encouraged the kids to see this project as a group project and TOGETHER we were creating something beautiful. It wasn’t important who had the most beautiful strip or who’s was the most creative because each piece was equally as important in creating the final product. I used this time to explain to the kids that the project is much like their life. They are all different but together than can be the beautiful future of their community and their country. The kids at camp are from different rival areas in La Limonada, and while in La Limonada are not allowed to cross area boundaries because of gang violence. However, at camp they are free and develop close relationships with one another. It is these relationships that can change the future of their community, La Limonada.


After Art Camp, we assembled all the strips into banners for the schools. We hung that at the Art Show and then hung them in the schools before we had to leave. The banners are absolutely beautiful on the walls, and I hope they do remind the kids of Art Camp whenever they look at them! ValorArte 2012 was an unforgettable experience. I am so happy to have been a part of it again, and I hope and pray everyday that next year we are able to give the amazing experience of Art Camp to the kids of La Limonada again. Fundraising has started, and we have a long way to go. If you are interested in sponsoring a child to go to Art Camp or would like more information, please contact me at ericha@athentikos.com.


Photography by: Sara Harper and Amelia Moore
menu
Tie-Dye Banner at Art Camp 2012